 How to resolve AdBlock issue?
 XOR NerdSEQ - Part 3
Author and photos: Peter Kaminski
Since our first introduction (XOR NerdSEQ part 1) and part 2 (XOR NerdSEQ part 2), a lot has happened with the modular NerdSEQ sequencer in Eurorack format. There are indeed many innovations to which we would like to draw attention in this third part - both in terms of hardware options and firmware. Three new expanders are now available, and firmware 2.x has been released for some time now, offering massive enhancements.
Incidentally, this is a premiere for us, as we have never before conducted a product test over such a long period and never before in three parts. This underscores the complexity and expandability of the system. And at SuperBooth 2025, firmware version 3 of the NerdSEQ will also be presented, which we have already been able to test here in a pre-release version.
Multi I/O Expander
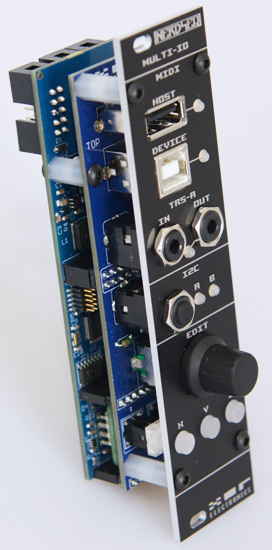
In addition to the I/O expander with DIN jacks and a connection for the Sega Gamepad, as well as the compact 2HP MIDI expander with mini TRS jacks, there has been a third expander with MIDI since 2024: the multi-IO expander. This expander with a width of 6U not only has MIDI but also offers additional functionality, such as an I2C connection and an encoder with three function keys.
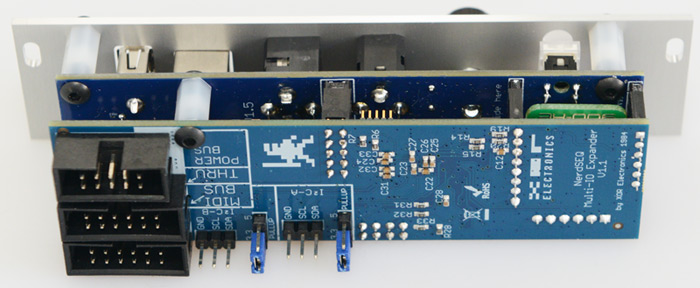
On the back, there are three connectors for the power supply and the internal MIDI bus, as well as a MIDI-Thru to which you can connect another gamepad expander. The connector is not intended for further MIDI expanders because in a NerdSEQ system, MIDI is only supported by one expander.
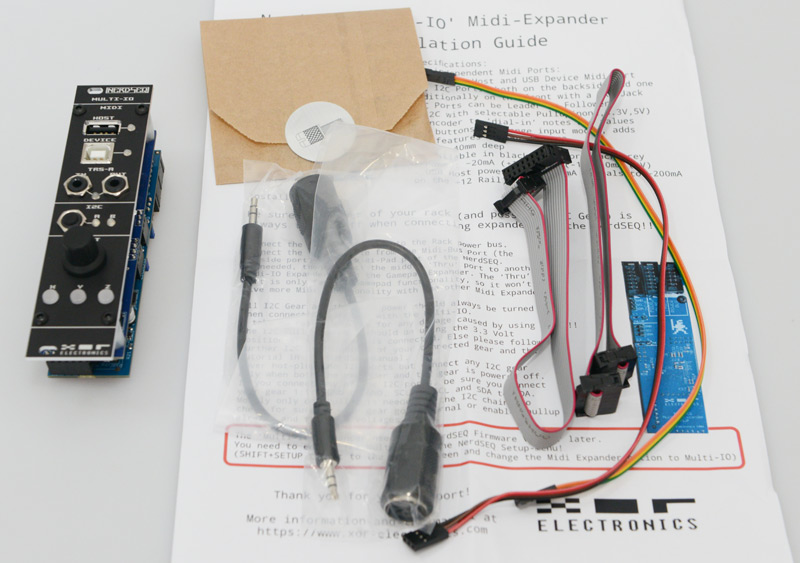
The Multi-IO Expander comes with two ribbon cables, a MIDI-DIN/Mini-TRS adapter, and an installation guide.
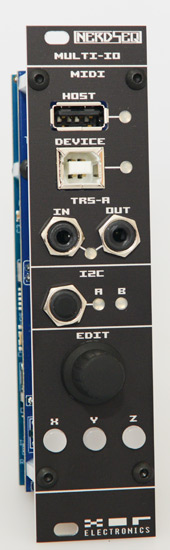
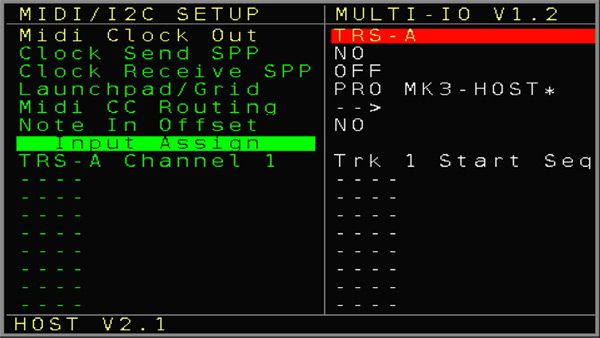
The Multi-I/O has a MIDI host port (USB-A) to which, for example, a Launchpad (USB Class Compliant) can be connected - but it is also USB hub-capable, allowing several devices to be connected to one port, such as a Launch Pad and a keyboard, etc. Furthermore, a MIDI device socket (USB-B) is available for connection to a computer, for example, to access the NerdSEQ with a DAW software, as well as a TRS socket for MIDI input and output. The configuration allows for extensive adjustments to the routing and use of the MIDI ports.
What is special about the Multi-IO is that it also offers an interface port for connecting to I2C-capable devices or Eurorack modules. There are not many devices that support I2C yet. Some examples are: Orthogonal Devices ER-301 Sound Computer, Expert Sleepers disting EX, the 16nx fader bank, Mannequins Just Friends, and TELEXi and TELEXo Teletype Expander. For hardware configuration, there are some jumpers on the back of the module. I2C is a very specific topic. You can find more about this in the NerdSEQ manual and in the installation instructions for the Multi-IO. If you want to learn more about I2C, you should visit the following website: https://llllllll.co/t/a-users-guide-to-i2c/19219
All MIDI ports and the I2C interface have indicator LEDs that show the data traffic. Below the I2C interface, there is an endless encoder for parameter selection and three function keys. The standard mode is Mode X. When button X is pressed and turned, the setting speed increases. The other two buttons, Y and Z, may have different functions depending on the page selected. The Y button and turning the encoder can usually be used to delete the selected parameter, while the Z button and encoder can be used, for example, to completely move events on a track. More features will be offered here in the future.
ART add-on expander
The Multi I/O Expander can be further expanded with the ART-Add-On Expander, which will be available from April 2025. “ART” is a system from TipTop Audio that allows polyphonic modules to be patched. USB-C jacks are used as patch jacks for audio and control signals to the modules. However, TipTop Audio's Polytip patch cables transmit analog signals - not digital ones. The ART-Add-On Expander is 2 HP wide and requires the Multi-I/O Expander. It provides two ART interfaces. The NerdSEQ can output the following commands: Note ON/OFF in different velocity levels (30, 60 and 100% as well as random), modulation wheel, pitch bend, portamento controller, and program change. The extent to which these commands can be executed depends on the modules and their range of functions.
Dualchord Expander
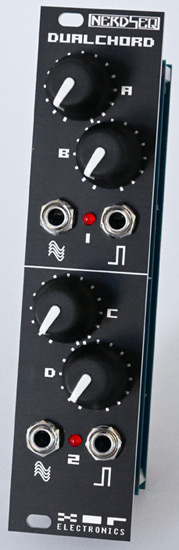
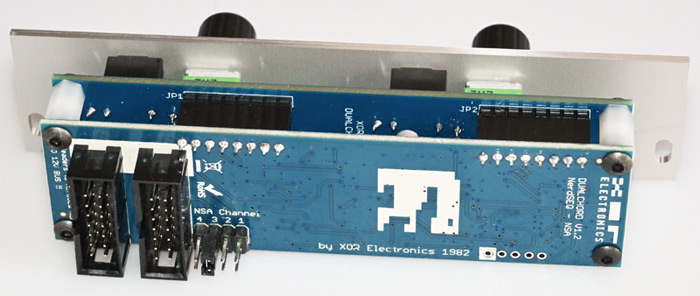
Since the end of 2024, another expander has been released that can be used to generate sound, i.e., a multiple tone generator that can be connected directly to the NerdSEQ bus. The module has a width of 6 HP with two oscillator sections, each with two audio and two gate outputs. In addition to the instructions, a ribbon cable and two knurled screws are included. On the back (see figure below), there are two sockets for the NSA bus and four jumpers for setting the NSA address of the module on the bus.
An oscillator section offers an audio engine with four oscillators that can output four mixable waveforms (sine, triangle, saw and pulse). Internally, there are two triggers that can be switched to a module, as well as eight LFOs with a triangular waveform for modulating frequency, waveform morphing, or pulse width. The module's four knobs can be used to adjust various parameters, such as pitch, level, glide rate, pulse width, and waveform morphing. There are different modes, such as monophonic, multi-oscillator, paraphonic, and chord presets. Stereo operation is also possible, where oscillators can be shifted in phase or frequency to each other to create a stereophonic sound.
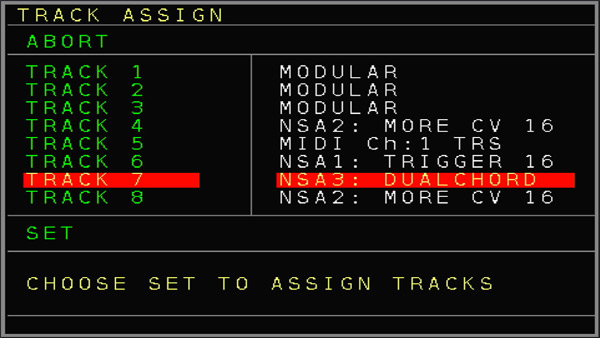
In terms of operation, you assign a track to the Dualchord Expander, just as you would to the other modules (see figure above).

In a pattern on the track (see figure above), there is one page for each oscillator section with the four oscillators (table columns), and then two further pages for FX 1 to FX 3, patch, and groove.
Firmware version 2
In part 2 of our test, we used the firmware version 1.25. An incredible number of new features and additions have been added to version 2. From version 2.02, for example, all the new expanders listed here in the test are supported, as are the I2C and ART functionality and dual chord presets. The English manual in PDF format has now grown to over 200 pages and has almost doubled in size compared to firmware 1.25. So it should be clear that we can only address a very small part of the many innovations here. Therefore, we are giving you a very small insight into firmware version 2.02.
There are also many basic functions that have been improved or added. When you delete something, a copy is automatically created in the clipboard, making a cut/paste function immediately available, for example, for events or patterns. There is now a shortcut command for Pattern Content Delete with SHIFT+MARK+DELETE. A marked part in the pattern screen is now played back in a loop after playback starts. The user can now also set flat/sharp note values for mapping and scaling.
Triggers can now also be output at the CV16 module. On a track defined as Trigger 16, triggers and gates have been added for all 16 triggers in the Automator. The MIDI configuration now offers various routing options for MIDI Clock Out (off, TRS, host, device, and also combinations). The Launchpad functionality has also been expanded and now has its own configuration menu.
Furthermore, recording filters for MIDI CC, channel aftertouch, pitchbend, poly aftertouch, and program change have been added - and MIDI song position pointers are now supported. The playback order of a pattern can now be influenced by an FX command (forward, backward, ping-pong, random, even/odd, spiral, crab, drunk, etc.). The new mapping function allows all parameters to be linked to all internal or external parameters. This makes it possible to implement very complex setups.
From firmware version 2.03 onwards, presets can also be used in conjunction with the Dualchord Expander, allowing you to quickly change a sound directly in a pattern without having to take complicated detours.
Video synthesizer function (firmware version 3)
New and introduced at Superbooth 2025 is the video synthesizer functionality, in conjunction with the “More Video-I/O Expander” already introduced in part 2 of our test, which also has a small GPU. The video synthesizer functionality is integrated into the sequencer. We had already announced this function in part 2 of the test, but now it is a reality. The maximum output quality is 1920 x 1080 pixels – i.e. HD quality – at a maximum of 60 frames per second. We had the opportunity to work with the NerdSEQ 3.00 RC1 and a pre-release of the firmware for the video module, which then offers these possibilities, before the SuperBooth 2025.
So-called shaders serve as the basis for video synthesis. A shader is a description of an animated graphic in a specific language. A shader then has various parameters that can be used to modify or modulate this animation. The advantage is that such shaders are available in bulk, for example on the Shadertoys website. There are also shaders available for the NerdSEQ that already have the corresponding modulation parameters. With free shaders, you may have to define these control variables yourself. This is not for everyone - and without programming knowledge, it is not that easy.
There are eight shaders that can be assigned per project. The shaders can be loaded via a USB stick or from the SD card into the NerdSEQ. The Video-I/O Expander has a USB port for this. The shaders must meet certain file naming conventions here. The NerdSEQ can provide up to 16 variables for modulation in a shader. These variables can be modulated, for example, by using MIDI data and CV values. The video expander provides eight LFOs and envelopes for modulating the shader variables. A video setup is used to select the shaders and assign the modulation sources. There is a new type of track, namely a video track, where the corresponding control commands can be integrated.
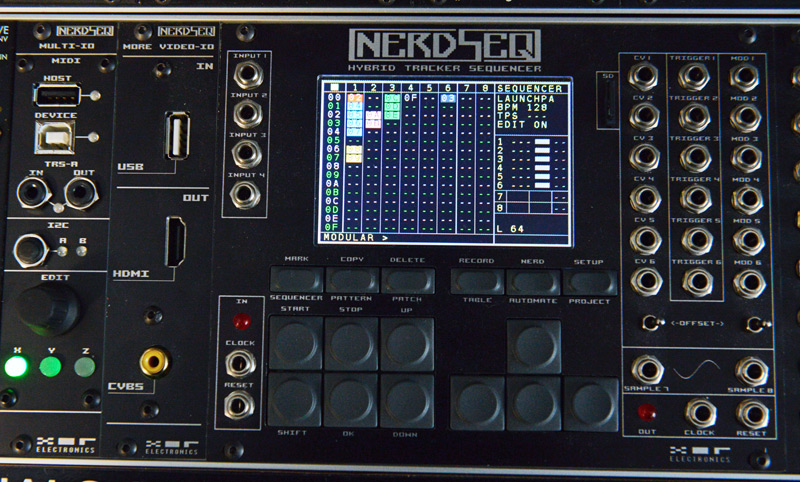
Here is a further overview based on screenshot. Pressing the PROJECT button twice opens the new VIDEO PROJECT page. This page is very long and has a wide range of parameters, so we have to display this page here in different screenshots.

In the upper part of the page, various track parameters can be set, as well as the video output display mode: either the NerdSEQ screen (Clone) or one of the eight shaders (see figure above).
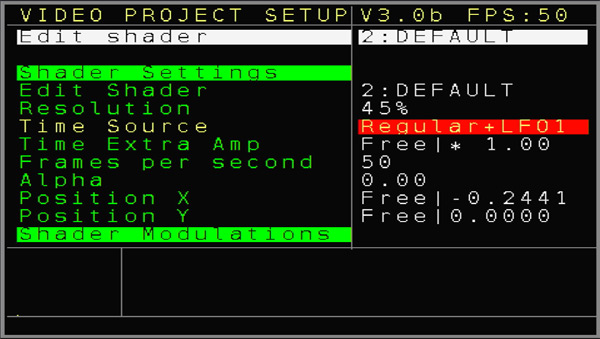
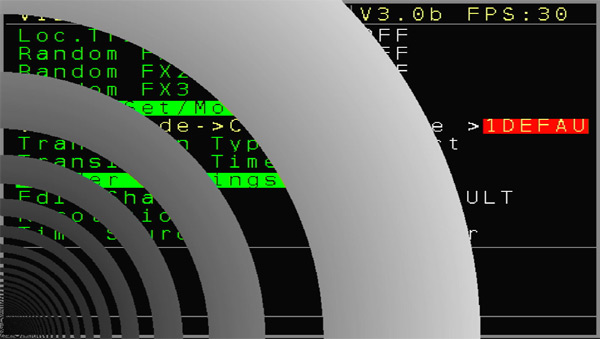
The next part of the page is dedicated to the shader settings. Here, you can load a shader via the menu entry “Edit Shader”.
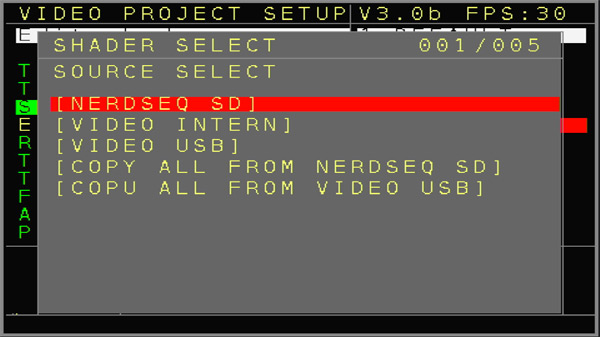
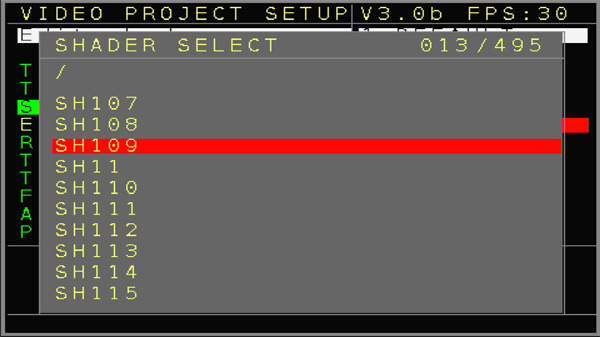
You can use a file browser to select the source, for example the NerdSEQ SD card or the USB stick in the video module. Then, you can select the desired shader (see figure below).
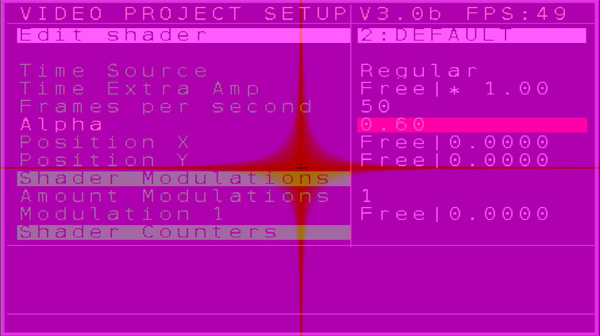
Each shader requires a different amount of GPU processing time. Therefore, it may be necessary to adjust the RESOLUTION accordingly, i.e., to reduce it, so that the display runs smoothly. In this area of the page, there are also the first parameters that can be modulated. In the example above, for example, the playback speed (Time Source) is modulated by an LFO of the video mode. The frame rate can also be adjusted. The achieved frame rate is always displayed in the upper right corner of the page for control.
With the parameter Alpha, the shader can be set to be continuously transparent, making the NerdSEQ visible underneath. Here are two examples.
This does not work with all shaders. However, XOR provides some of its own shaders where this is guaranteed.
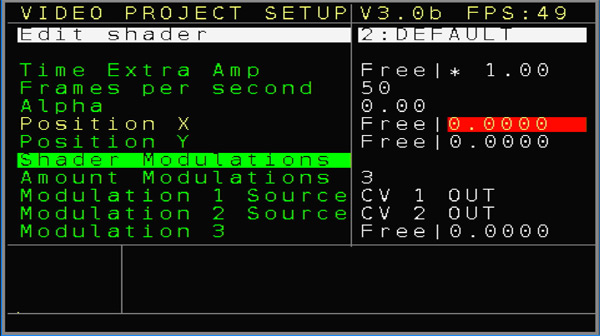
The shaders also have up to 16 modulation parameters. How many parameters you influence can be set using “Amount Modulations”. In the example above, there are three parameters for which you can also set a modulation source or a fixed offset value (Free).
Here is an example with three set (see figure above) fixed parameters.
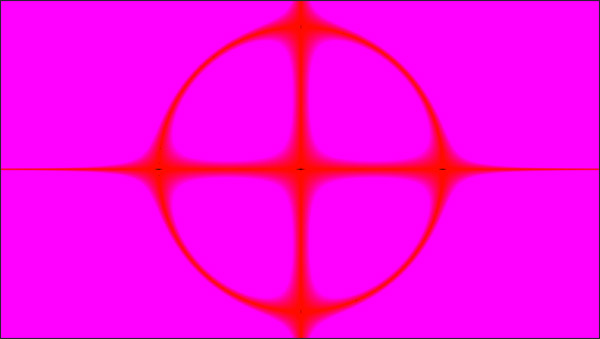
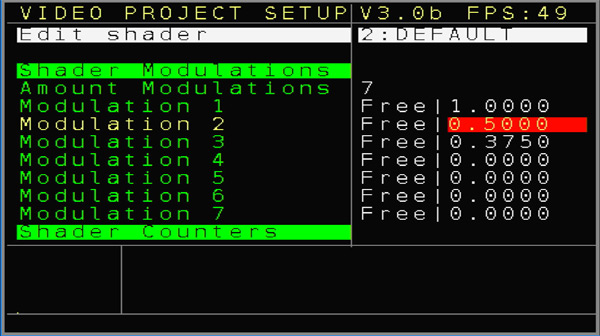
Normally, when all parameters are set to 0, the result with the default shader is a point that mutates into a star (see figure above).

If you change the three parameters, as shown in the screenshot above, the result can be significantly changed. With dynamic modulation, the whole setup really comes to life.
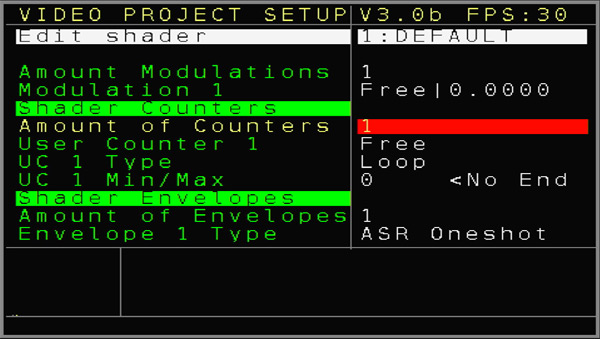
The page also contains a shader counter and the settings for the eight envelope generators (see figure above). Again, the number of counters and envelopes can be customized. This is useful because otherwise the page would be significantly longer than it already is, given all the possible parameters.
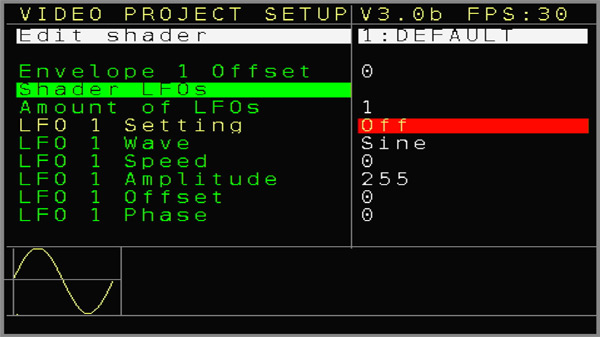
At the end of the envelope generators, the eight LFOs of the video module can be set. Again, there is the option to select the number of LFOs used. The LFO waveform is then displayed at the bottom, or the envelope curve for the envelopes.

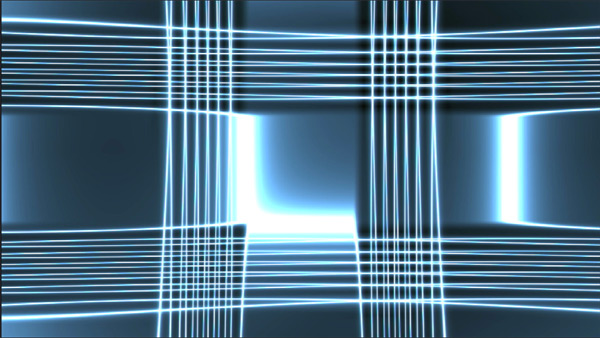
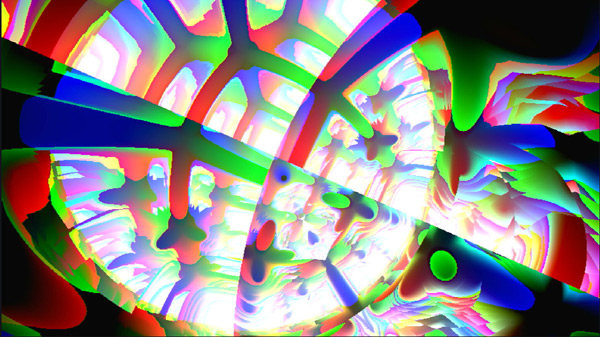
Here are some screenshots of some shaders as examples. Of course, these still images are only snapshots, but they should already illustrate the potential of the NerdSEQ video synthesizer's functionality. The complexity is scaled very high. For example, a simple rotating cube (see figure above) or a star (see figure below).

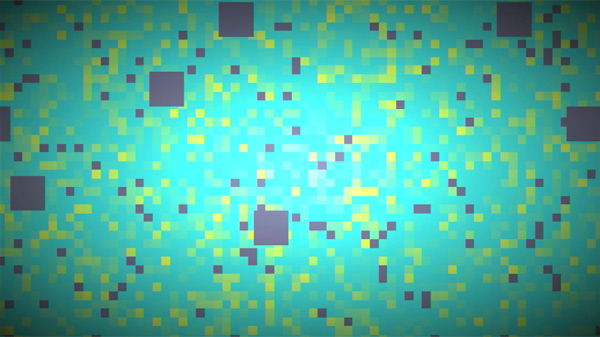
The shaders can also take on very flat structures with patterns.

But there are also shaders with really very complex shapes that also perform very complex changes over time.

To be able to record the results as a video, you can also use a very inexpensive video USB stick, which should be set to a resolution of 1920 x 1080. Such USB video sticks are inexpensive to buy. You should choose one that is suitable for HD and not for 4K resolution.
Only a few DAW software packages offer video recording, but the OBS software offers an alternative. You then just have to create the video file in the video editor. But the now integrated video synthesizer - in conjunction with the video add-on module - should also appeal to many live modular artists, as they can create beautiful and dynamic video graphics that are synchronized to music with little effort. Getting started with some video synthesizers is much more complicated than the NerdSEQ's video synthesizer operating complexity.
Conclusion
The Multi-I/O Expander is a big step, which, among other things, makes it possible to connect a Launchpad and an additional MIDI input and output. With the standard interface with MIDI DIN jacks, on the other hand, a connected Launchpad blocks further use of MIDI due to a lack of interfaces. Another advantage is the encoder, which allows for more convenient parameter entry. The option of the I2C interface and control via the ART interface will only be of importance to a few users, but they will appreciate this flexibility. The price of the Multi-I/O Expander is around 260 euros.
The Dualchord Expander, which costs around 200 euros, is an interesting way to integrate oscillator functionality directly into the NerdSEQ ecosystem. The advantage I see here is the deep integration of the sound generation into the sequencer. Even with four different NSA modules in simultaneous operation (video, drum, CV and dual chord expander), there were no problems in practice. Developer Thomas Margolf has now provided a firmware version where one or two things will certainly be added or improved, but the status is already such that the overall functionality is pretty much complete. With the new expanders, the hardware side should also be largely complete.
The video synthesis integration is the icing on the cake. It's amazing what the More Video Expander-I/O Expander and its GPU can produce on the side in terms of graphics - and all as a free update. The price of the video module is manageable and a fraction of a hardware video synthesizer. The whole thing works really well - even in the first version and with an acceptable latency to the CVs and gates of the NerdSEQ. If it gets too big, you still have options for adjusting it using various parameters. By the way, the More Video Expander-I/O Expander costs about 250 euros. A manageable price considering that NerdSEQ owners get a video synthesizer for it.
The NerdSEQ is still the only truly modular sequencer on the market. Users can put together the hardware according to their needs within very broad limits and adapt it to their requirements. The functionality is enormous and unique in terms of the range of functions.
Of course, the tracker-based workflow is not always the fastest. A simple sequence can certainly be realized faster with a step sequencer, but when it gets more complex, you quickly learn to appreciate the flexibility and incredible range of functions of the NerdSEQ. For example, I always pair an Erica Synths Black Sequencer with the NerdSEQ, which is the ideal combination for combining simplicity with a high level of functionality. With a step sequencer, you quickly reach functional limits, and that's where the NerdSEQ comes into play. Almost anything is possible. For me, it's the ideal workflow.