 How to resolve AdBlock issue?
 Steinberg Cubase 14 Pro
Overview and Update
Author: Heiner Kruse
The latest Cubase version 14 from Steinberg was released at the beginning of November 2024. An update of Nuendo, its big sister software, is expected in 2025. We have tested Nuendo several times and presented its individual updates. In this test, we will focus on the innovations in Cubase 14, which mainly involve music production. However, we have only tested Steinberg Nuendo so far. Therefore, we first present a basic overview of Cubase.
Cubase is equipped with numerous instruments and effects and is capable of professional MIDI and audio editing. On the instrument side, Cubase also has a lot to offer including Halion Sonic, Padshop, Groove Agent SE, and Retrologue. An internal solution for vocal editing and pitch correction is available with VariAudio. Many well-known producers and composers use Cubase, including Hans Zimmer. In addition to Cubase Pro 14, Artist 14 and Elements 14 versions also exist. They are complemented by Cubasis for iOS and Android devices and the Cubase Remote app. In this review, we will exclusively discuss Cubase Pro 14.
Differences to Nuendo
Steinberg is expanding its offer to include Nuendo. Cubase and Nuendo are largely the same to use, but Nuendo offers additional features such as: larger multi-channel formats, external Dolby Atmos renderer, video editor recognition, field recorder BWF metadata import, MPEG-H audio authoring, sampling rates up to 384 kHz, dearVR Spatial Connect support, and much more. These features are particularly useful for the areas of post-production, the connection to game audio, and the area of film and video post-production. Therfore, Cubase offers features with which music producers are well equipped.
Installation
The serial number is entered using Steinberg's Download Assistant. After completing this step, all downloads are available to the user. Cubase can be installed on two computers.
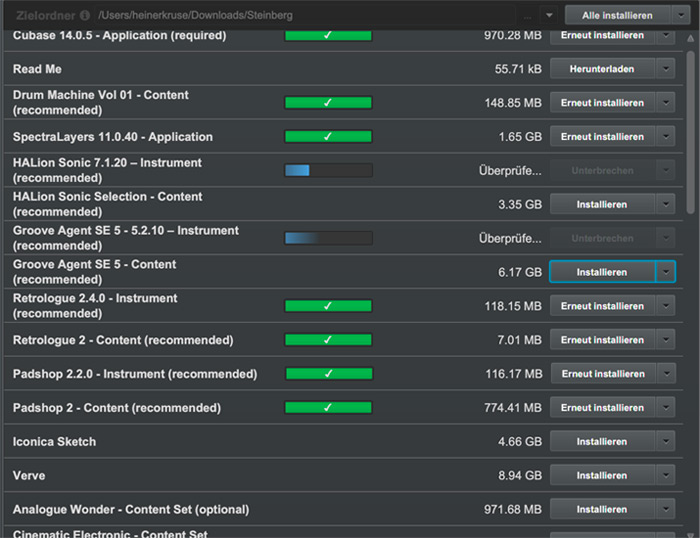
During installation, a Library Assistant is active in the background, which also displays installation paths in case of uncertainty. The destination and download folders can be customized. You need 1GB of storage space for a core installation and 80GB for a full installation. Depending on your individual needs, you can choose the content and components to install.
The system requirements are specified as follows: 8GB RAM, 4 CPU cores, 1,440 x 900 minimum screen resolution. For Windows computers: 64-bit Windows 11 version 23H2 (or higher), 64-bit Windows 10 version 22H2 (or higher), Intel Core i5 (4th generation) or AMD Ryzen. For Mac computers: macOS Ventura, macOS Sonoma, macOS Sequoia, Intel Core i5 (Late 2018 or later), or Apple Silicon. Apple Silicon is natively supported.
VST 2 is no longer officially supported. However, VST 2 plug-ins can be loaded (except in native Apple Silicon mode) if the VST 2 plug-in scanner is activated in the VST plug-in manager. VST 2 is a discontinued; therefore, you should refrain from installing it and thus install only VST 3 plug-ins.
What's new in Cubase 14?
We now examine the new features in version 14 of Cubase, all of which will also be available in Nuendo 14.
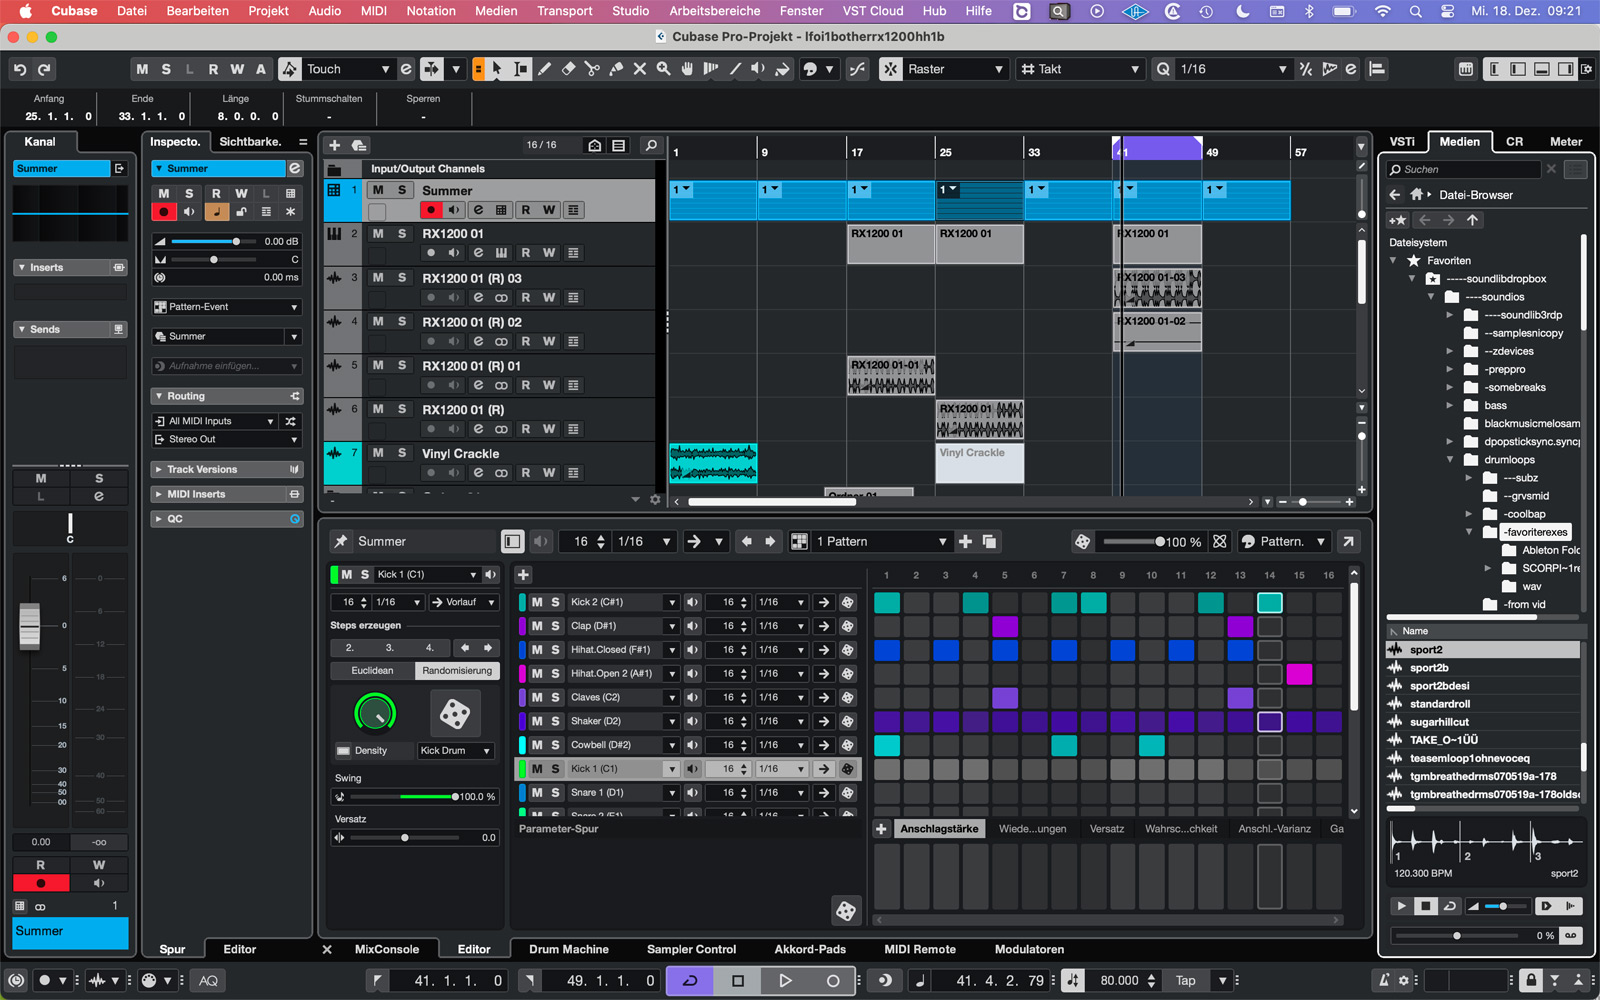
Drum track
Drums are a new type of track that can have both pattern and MIDI content. The new Drum Machine instrument and the associated (pattern) editor are automatically linked and immediately available when creating a track. I find this integrated solution particularly successful, and Steinberg wants to offers a new, compact solution here. In the lower panel of the user interface, you can switch between the editor and the drum machine. It should not be forgotten here that the MIDI effect “Beat Designer” has been a comparable tool for many years, with slightly fewer or different options, that can be used with any instrument, especially the integrated Groove Agent SE.
Editor in the drum track
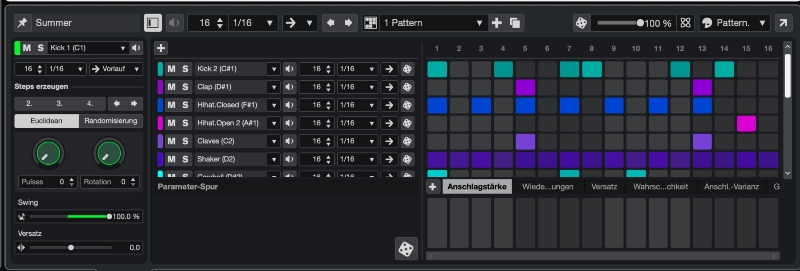
The pattern editor allows intuitive drum programming in the typical step sequencer style. Patterns can also be created and modified randomly in various detailed ways. Outstanding are the options to quickly incorporate probabilities for individual beats or velocity variations, or Euclidean pattern settings for individual tracks. Automated note generation with options such as “Add a note on every 2nd, 3rd or 4th step” is possible, and polyrhythms, different playback directions, and a global swing factor can be set. The only thing that I miss is an option to use groove templates. This way, new lively patterns can be quickly created from nothing, which can also fill longer periods of time.
Thus far, pattern presets refer to the combination of the Beat Designer MIDI plugin and Groove Agent SE. Both were already included in Cubase. In my opinion, the new drum tracks are more about quickly creating content yourself. This is made easy for you.
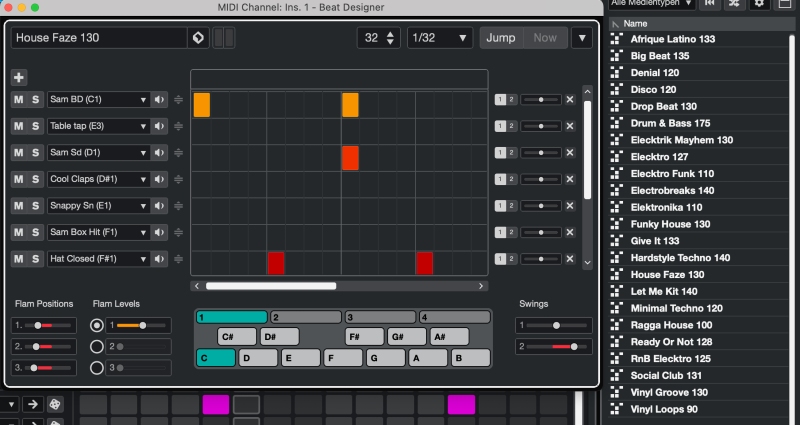
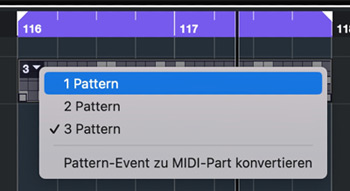
Drawing a region in the arrangement area then automatically fills it with a pattern from the editor. It is also possible to export from the editor via drag and drop. From that point forward, the pattern no longer plays from the editor, but in the main sequencer. Regions in the Arrange area are still linked; thus, changes in the sequencer are applied. In addition, a flip menu allows you to select patterns if there are several available in the editor area. This reminds me of the successful concept of pattern tracks in the first versions of Reason. From here, patterns can also be converted to MIDI regions.
One downside we encountered during testing was that the render-in-place conversion only worked after converting the pattern into MIDI data.
Drum machine from the drum track
In contrast to Groove Agent, the Drum Machine instrument not only allows you to load samples, but also to create synthetic drums. There are, for example, four different kicks, six snares, eight hi-hat types, nine percussion options, many more - and the sample option.
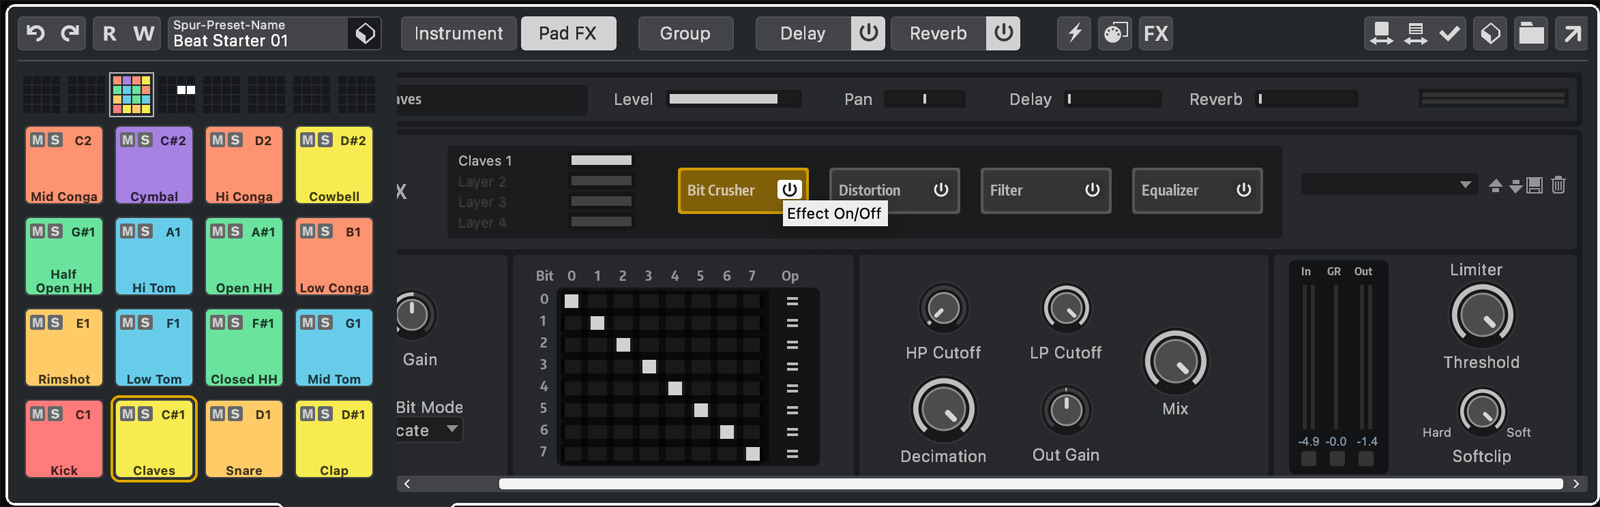
Samples can be quickly searched using the Media Bay. There are different parameters for drum synths and samples. For example, a kick drum has an oscillator and a click part, pitch, distortion, and more, while elsewhere there are filters, pitch, and pan settings. Each pad has four layers, so that synthetic and sampled sounds can be combined. The delay and reverb send can also be set per layer. There are also four pad FX for each pad. These include a bit crusher, distortion, filter and equalizer, each with very detailed adjustment options. There is no doubt that a well-organized arsenal of sound design tools is at your fingertips in this section. I found it easier to use than Groove Agent SE, for example. For slicing operations, you switch to Groove Agent or the very interesting Sampler, which also supports spectral time-stretching modes.
Kits in the drum machine are arranged in a 4x4 matrix with 16 pads, but you can define up to 8 (groups) x 16 pads, for a total of 128 pads. Drum track presets load various kits from the drum machine (so far without patterns).
Modulators
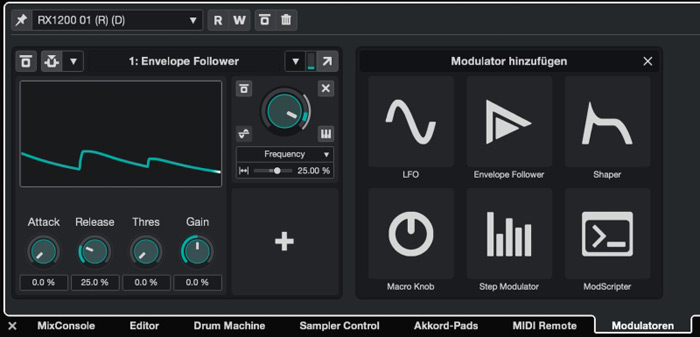
With the new modulators in Cubase 14, you can set any parameter in motion. What can usually be achieved with a synthesizer is not so easy at the effect or audio track level. The goal is usually to add liveliness to the sounds or to realize modulated movements of objects when mixing Dolby Atmos. The modulators can be added to or edited in the modulators tab of the lower zone, but also in instrument windows.
In either case, you have access to all channel effects. For example, you can use LFO modulation to add rhythm to a reverb. To do this, go to the Modulators tab in the lower zone. There you will find the LFO, Envelope Follower, Shaper, Macro Knob, Step Modulator and Mod Scripter. If you add a modulator here, you can adjust assignments with settings for the initial value, modulation depth, and polarity (unipolar/bipolar modulation) in square areas to the right.
Visually, editing assignments in the modulators tab reminds me somehow of Bitwig. Modulators can also modulate each other. The envelope follower can also react to a side-chain signal.
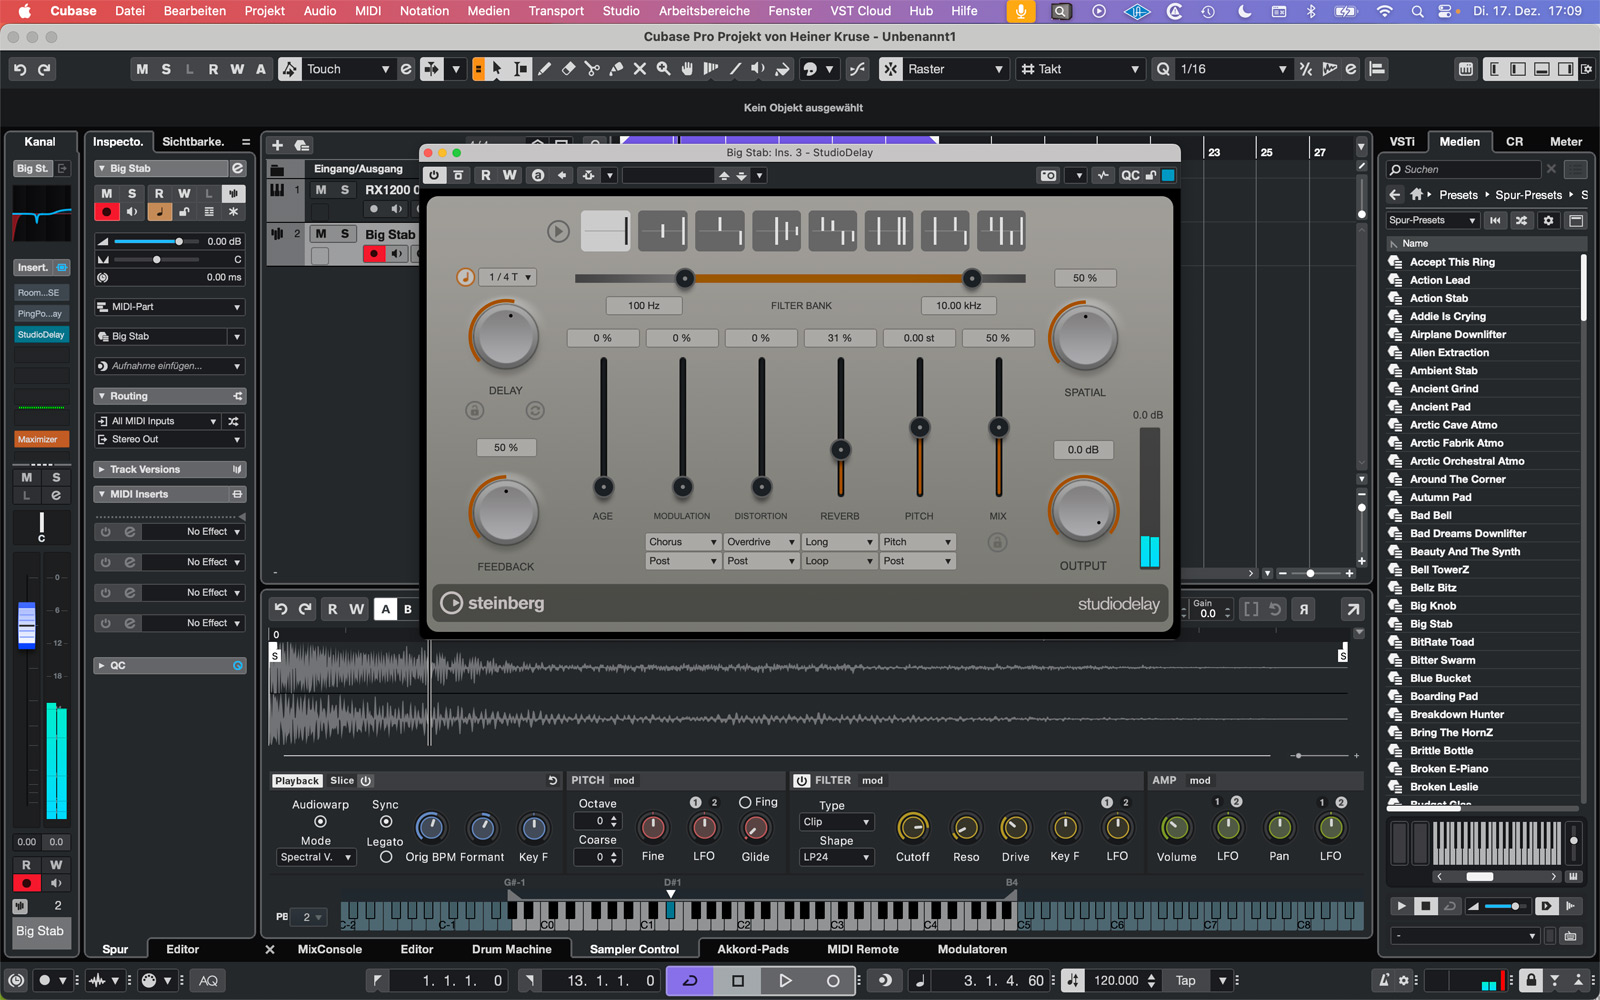
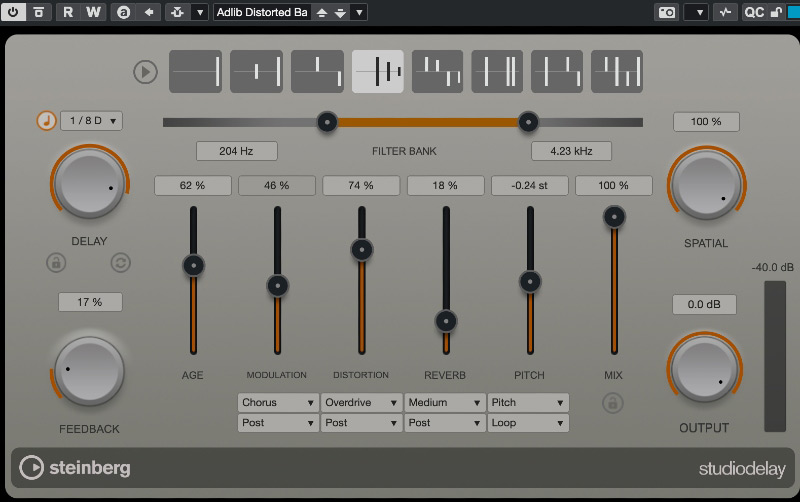
Shimmer and Studio Delay and other effects
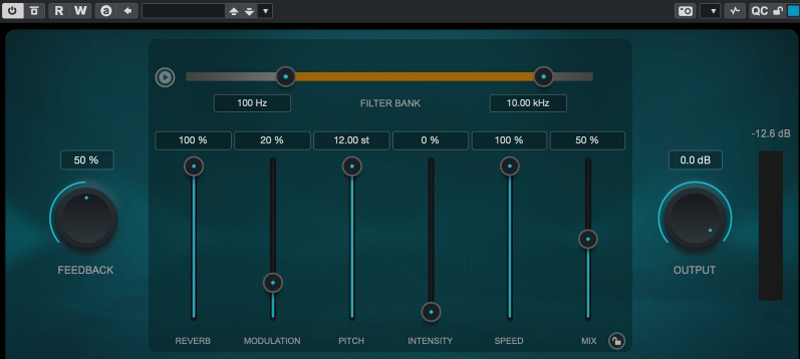
The integrated and easy-to-use shimmer effect is a new feature. Shimmer reverbs typically transpose the reverb (usually upwards, in shimmer optionally by +/- 12 semitones). Shimmer also has a feedback option so that a transposition can continue forever. The filter section at the top is also useful for cutting frequencies in the reverb signal path. There is no parameter for the length of the reverb, but there is modulation. The small internal play button is also useful for checking settings with a test signal.
This can also be found in the visually similar Studio Delay. Here, you can set various tap modes (including ping-pong), age, modulation, distortion, reverb, and pitch. Among the parameters, an effect type and its placement in the loop can be selected. This is very practical. During testing, I found the effect of the reverb in the feedback loop somewhat difficult to adjust, and even at just one percent, feedback could escalate with settings where little had happened before. Distortion in the feedback loop, on the other hand, is less sensitive. The effect is subtle and can be turned up without much risk to make the echoes a little rougher. The spatial controller adjusts the width of the effect. At 50 percent, the reverb still sounds relatively narrow, at least compared to the shimmer plug-in.
The new effects are not only far ahead in terms of sound but also in terms of operation. Complex possibilities are readily available here very easily. Other new effects include a volume plug-in, an auto filter, and an underwater effect. Although not an effect, the SuperVision Analyzer plug-in now allows more variable color assignment, for example by time, intensity, or average frequency.
Score Editor
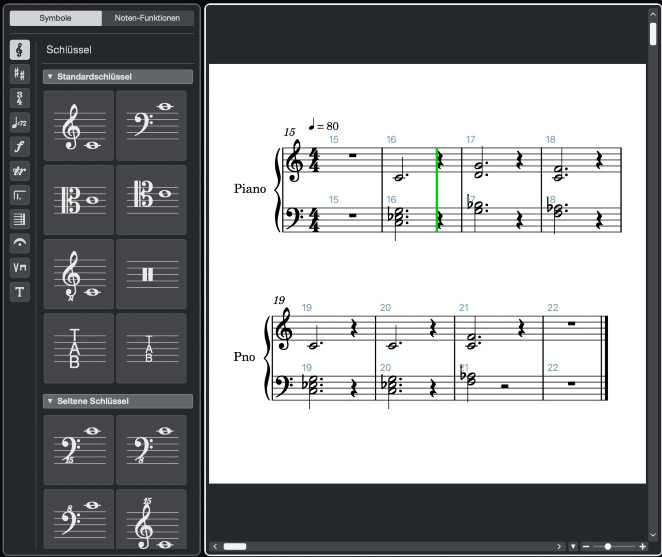
The new score editor is based on Stienberg’s Dorico and is also included in all Cubase variants. What is special here is that the appearance of the notation can be optimized independently of the MIDI notes. A clean, typical notation display is often a problem in DAWs when necessary edits compete with it. Therefore, this editor implements display quantization.
In addition, the interpretation of played phrases is particularly musical, with matching ties or staccato signs often being recognized. Complex sheets with several instruments are also possible. Presets are available for various instrument types. The layout function allows you to select instruments and tracks to display or print selected sheet music for different instrument groups. From the page view, you can also switch to a full view for a better overview on your computer.
Editing and Mediabay
Parameters for probability and velocity variance are now also available in the editor area for instruments. This allows content to be varied automatically in doses. Finally, electronic music production can thus approximate the interesting characteristics of human playing skills. Such tools may have been first found in Ableton Live, where the response to them was very positive.
The range selection tool has also been improved. You can simply double-click to close a gap. With CMD/ CTRL + L/R arrow keys, selected content can be moved in selected groups. Other useful improvements have also been added. For example, it is possible to mute a selected area with ALT/Option + M or perform slip editing without having first separating the selected area. When slip editing, the audio content of the events can be moved within them without losing the region position.
The player in the Media Bay now also has options for tempo- and beat-synced sound playback and, unlike Logic, is also able to play loops in the common REX/REX2 format. Samples and loops can also be previewed at half or double speed with tape-style adjustment (tempo and pitch change simultaneously) or with adjusted pitch and imported with the selected settings.
Sound, Mixer, Event Curves, DAWProject
Whatever I did with Cubase 14 quickly sounded very good. Maybe I had a good hand these days, but I had the impression that it was also due to Cubase and the integrated sound material. It would go beyond the scope here to list the many high-quality sounds included. I particularly liked the presets of the Verve piano library. No wonder, as the sounds were recorded at the Yamaha Studios in Los Angeles.
In Cubase 14, you can also use a stylus to easily draw event-related volume curves that can be distinguished from normal automation. This can help, for example, to adjust volumes before compressor processing.
In the lower zone, you now have the option of a complete mixer view. You can now also move tracks in the mixer, and this also changes the layoutt in the arranging area. Thanks to this update, Cubase 14 now allows you to export projects in the new, open DAWProject format, which should make it easier to exchange content between DAWs. How well the export is handled depends, of course, largely on the implementation in the target DAW software. There is still room for the optimization of various DAW manufacturers.
Cubase operation compared to other DAWs
For users who are not familiar with Cubase and are at home in other DAWs, here are some tips on specific differences.
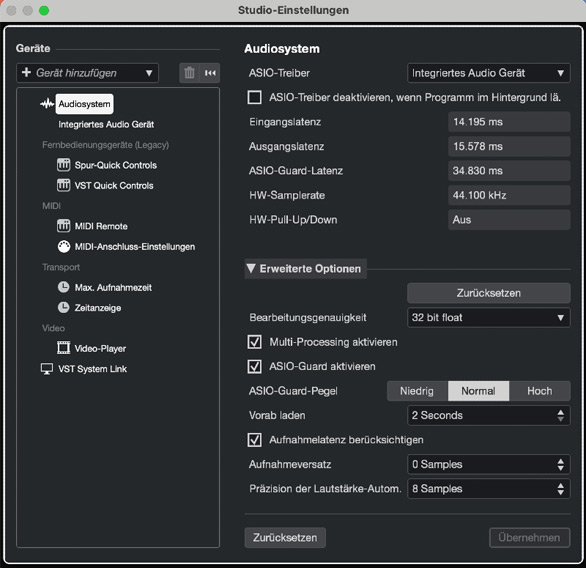
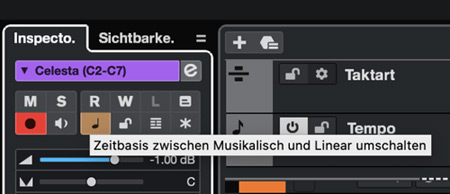
The audio interface is not set up in the “Settings” - it is set up in the “Studio” submenu. ALT+K quickly displays a virtual keyboard on the laptop. At the very bottom, a transport area is displayed that offers Rec/Play and Cycle activation, as well as settings for tempo and locator points. It is also possible to switch the display area to timecode here.
As in Pro Tools, you can set whether each new track should be based on time (in Cubase this is called “linear”, in Pro Tools it is a sample-based track) or on MIDI tempo (in Cubase the track is in “musical” mode, in Pro Tools the track is based on ticks).
In this way, Cubase, similar to Pro Tools but more easily than in Logic or Ableton, can also be used as a tape machine replacement or for film music composition with simultaneous creation of sound effects. These aspects are often relevant for professional studios, not least when combining DAW production with classic music recordings such as orchestra and band productions.
Effects can also be linked to audio files and calculated offline, which is particularly useful for sound design for film. In the Pool, you can set a checkmark for “Music Mode” for audio files so that tempo changes are always included in audio files via time stretching.
A “Lower Zone” above the transport area shows varying content, for example, Wave Lab and software integrated via ARA 2, if required.
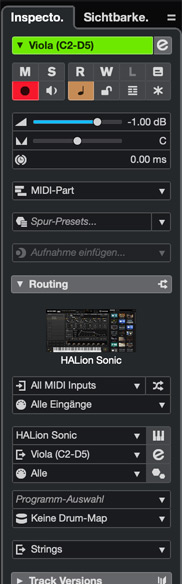
I find it difficult to get used to the fact that an instrument cannot be selected in the channel strip, but only from the Inspector.
Conclusion
Cubase 14 Pro is available from Steinberg for 579 euros. The Artist version costs 329 euros, while the Elements version just under 100 euros. Education versions are available at reduced prices. A list with a functional version comparison can be found on the manufacturer’s website: https://www.steinberg.net/de/cubase/compare-editions/
Cubase 14 consolidates its standing as a professional DAW for producers and studios. In particular, the already good possibilities for creating drum tracks (Beat Designer, Groove Agent SE) have been further improved with the new drum tracks. The modulators and new effects now make it even easier to add movement to sounds. This feature, which is also available in its big brother Nuendo 14, offers interesting possibilities for productions in Dolby Atmos.
On a positive note, I would like to emphasize the overall good sound impressions during the test, in terms of sounds, effects, and audio processing. This is already at a high level.